In part 4 we connected the cordless phones. All phones in the house can now call each other, but the house still can’t be reached from outside. In this part we connect MikoPBX to a SIP provider, so we get a real phone number.
Step 1: a phone number from a SIP provider
You need a VoIP subscription that gives you a phone number and SIP credentials. I use the prepaid VoIP service of CheapConnect, a Dutch provider. A phone number costs €8.95 a year, and you pay for your calls from a prepaid balance.
After signing up, you’ll find your SIP account under Prepaid VoIP → SIP accounts. According to the CheapConnect FAQ, the username is your phone number in international format, without the plus sign, and both the username and the password are in your welcome email and in the portal.

CheapConnect also offers a free SIP trunk. A trunk is meant for connecting a PBX with several numbers. For a home with a single phone number, a regular SIP number works just as well.
The portal also offers a listing in the phone directory (Gidsvermelding). I deliberately skipped that. I don’t want sales calls on the house phones: only family and friends get this number. Companies get my mobile number.
If your number was configured on another device before, like a router with built-in phone features, disable it there first. Two devices registering with the same account will steal incoming calls from each other.
Step 2: add the provider in MikoPBX
In MikoPBX, go to Routing → Telephony providers and add a SIP provider:
| Field | Value |
|---|---|
| Provider name | CheapConnect |
| Account type | Outgoing registration |
| Provider server address | voip.cheapconnect.net |
| Login | Your SIP username |
| Password | Your SIP password |

Outgoing registration means MikoPBX logs in to CheapConnect, just like a phone logs in to MikoPBX. When it works, the provider shows a green Registered label.
Under Advanced settings, two things matter:
- Additional provider addresses. Incoming calls don’t always come from the server you registered with. MikoPBX only accepts calls from addresses it knows, so I added CheapConnect’s other server addresses:
147.78.237.17andmtsip.nl. Without them, incoming calls were rejected. - Maintain NAT session. MikoPBX sends a small keep-alive message to CheapConnect every 60 seconds. That keeps the connection through your router open, so incoming calls can reach MikoPBX. This is why you don’t need any port forwarding, as I promised in part 1.
The network filter for the provider stays at Connections from any addresses are allowed: CheapConnect isn’t on your home network, so the internal-network filter from part 3 won’t work here. Everything else can stay at its defaults.

Step 3: incoming calls
When someone calls the house, which phones should ring? In MikoPBX you arrange that with a call queue: a group of extensions that ring together. Under Telephony → Call queues I created a queue called Extern gesprek (“outside call”) with number 99, and the strategy All simultaneously.
The members are the phones in the shared rooms and in our bedroom. The children’s rooms are not in the queue: they shouldn’t be woken by a call in the middle of the night. They can still be reached internally. I could have set up “off-work times” in MikoPBX, but at the moment there is not reason to let their phones ring on incoming calls at all. That might change in the future.
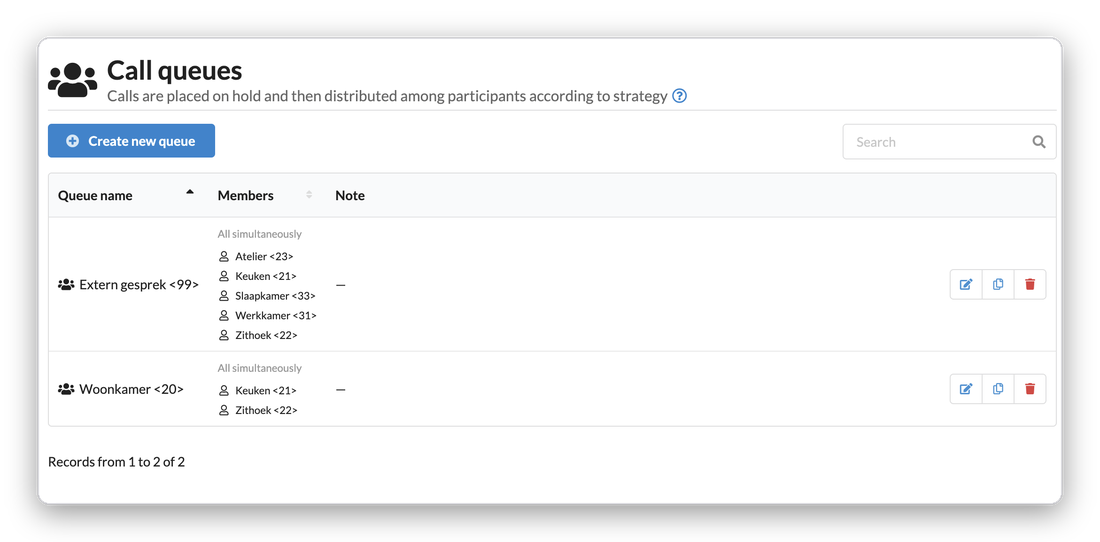
There’s a second queue in the screenshot: Woonkamer (“living room”), number 20. It rings the two phones in the living room at once, so you can call “the living room” without knowing which phone someone is near.
Then, under Routing → Incoming routes, send all calls from CheapConnect to queue 99. I set the default route, for calls that don’t match any rule, to the same queue.

Step 4: outgoing calls
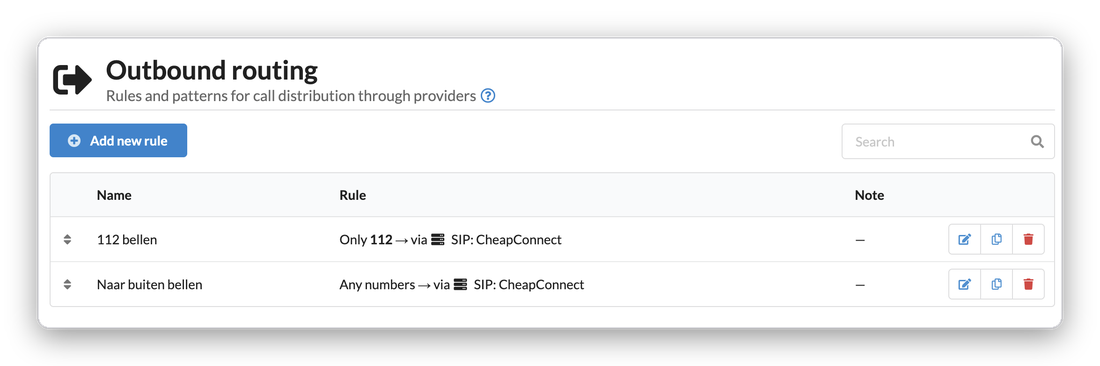
Finally, calls to the outside world. That’s done under Routing → Outgoing routes. Thanks to the numbering plan it only takes two rules:
| Rule | Number begins with | Digits after that | Provider |
|---|---|---|---|
| 112 bellen | 112 |
0 | CheapConnect |
| Naar buiten bellen | 0 |
any | CheapConnect |
The first rule sends the emergency number to CheapConnect. The second sends every number that starts with 0 to CheapConnect, unchanged. No internal number starts with 0, so there’s never any doubt.
Next up
The phone system is complete: all phones can call each other and the outside world. In part 6 it gets more fun: we connect Home Assistant, so you can ask for the weather forecast by phone.